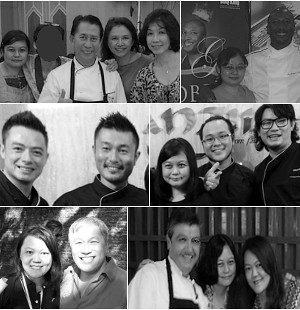
AFC GRILLED : Chef Sean Connolly

An evening of good food.

Lap Cheong Watermelon Bites

An asian take on watermelon bites!

Baked Fish with Kiwi in Sweet and Sour Sauce

Add a twist to sweet and sour fish!

Semperit Pandan Cookies

Cute cookies for the festive season!

Showing posts with label Recipes. Show all posts

Monday, June 19, 2017

Fluffy Cloud Eggs

13 comments

" It's so fluffy, I'm gonna die! " - Agnes (Despicable Me)


My feelings exactly. Cottony white cloud eggs are, I daresay, the stuff of foodie dreams from the enthusiasm I saw sweeping Facebook and Instagram a couple of months ago. I don't know if it's still a thing online but we love it here. My husband is an egg-loving person so it was something I had to try. Variety is the spice of life, right? Poached eggs, fried eggs, soft-boiled eggs, now cloud eggs.

Imagine biting into a savoury marshmallow - the best description I can come up with to give you an idea what this tastes like. Would you believe that it's easy to make?

Fluffy Cloud Egg

A hand mixer and an egg is all that is needed to create this. For taste, I top mine with cheese. It goes into the oven for awhile and voila! 

Cloud Eggs
Ingredients:
- 1 egg
- 1 tbsp grated cheddar cheese and 1 tbsp grated Vergeer Old Holland cheese (or cheese of choice)
- 1 slice of tomato
- Some chopped spring onions
- A pinch of black pepper

Method:
1) Separate egg white from yolk.
2) Using a mixer, beat egg white until stiff and fluffy.
3) Pour the beaten egg onto a baking tray lined with baking paper. Use a spoon to gently spread the top of the egg white to make a hole in the center, for the egg yolk to sit in.
4) Slide the yolk in. Sprinkle cheese over.
5) Bake in a pre-heated oven for about five to seven minutes until lightly browned.
6) Serve with a pinch of black pepper and the tomato. Garnish with chopped spring onions.

1) Cheese, Tomato, Egg Yolk, Spring Onions.
2) Beat egg white until stiff and fluffy.
3) Transfer egg white onto baking tray. 4) Make a hole in the center.
5) Slide egg yolk into the middle. 6) Sprinkle with cheese and bake!

There you go, a delicious cloud egg.

Cloud Egg with Cheddar Cheese and Tomato

Cheesy Cloud Egg

Here's one I made with just some Old Holland cheese sprinkled over.

A Fluffy Cloud Egg


Read more...

Wednesday, March 8, 2017

Penne Rigate With Cream Of Mushroom Soup

16 comments

A shortcut meal born out of a chilly day with dark clouds and dimmed sunlight streaming through. I heeded the call for quick comfort food to soothe my growling tummy and match the quiet mood. Nothing complicated, I told myself as I pictured me slurping on a hot bowl of creamy soup in my mind.

Penne Rigate With Cream Of Mushroom Soup

It was a lazy day. I flipped the kitchen cabinet doors open. There it was - a can of Cream of Mushroom soup staring back at me as though it knew what I was craving for. Pick me, it whispers. Oh, my imagination when I'm hungry! I reach out for it and the Top Shell I'd gotten from a hamper; there began my cooking adventure.

A bit of pasta, flat-leaf parsley and what I call the Chinese Bacon aka lap cheong completes the dish. The saying 'less is more ' cannot be applied to cooking surely. I think onions would make a nice addition?

Penne Rigate With Cream Of Mushroom Soup

Ingredients
- 2 cups Penne Rigate (Alce Nero Organic Penne Rigate)
- 1 can 470g Campbell's Cream Of Mushroom
- 1 can New Moon Braised King Top Shell in Abalone Sauce (slices)
(Drain sauce into a container for future use. Optional: Slice Top Shell into bite sized pieces)
- ½ yellow onion (chopped)
- 1 to 2 pcs lap cheong / chinese sausage (sliced)
- Flat-leaf parsely (chopped)

Method
1) Cook pasta according to packet instructions or to preference. Keep aside.
2) Use a deep pan. Pan-fry lap cheong without oil until lightly charred. Remove from pan and chop finely. Leave aside.
3) Using the same pan, now left with a little oil from the lap cheong, saute the onions.
4) Add top shell and stir-fry for a bit.
5) Pour in cream of mushroom soup. Then, fill the can to the top with water. Pour the water into the pan. Stir until well combined and simmering.
6) Add the pasta. Stir until the pasta is well coated, inside and out.
7) Finally, switch the heat off and stir the chopped parsley in.
8) Serve sprinkled with chopped lap cheong.

1) The Ingredients 2) Pan-fry the lap cheong
3) Saute the onions 4) Add Top Shell and stir-fry
5) Pour in cream of mushroom soup with water
6) Add the pasta 7) Finally, stir in parsley

Eat and be comforted.
Read more...

Saturday, February 4, 2017

Pan-Fried Breaded Nian Gao

12 comments
Nian Gao , a sweet sticky cake which sounds like Year High when spoken in Chinese, is said to symbolise reaching new heights in our lives - it is generally a wish for us to have a better year than the last. It is also known as the Chinese New Year cake because it is most sought-after during this festive season.

Mom-in-law (MIL) gave us some to bring home earlier this week. I was pretty excited about it because I do love the stuff. My mom used to fry it with eggs for us when we were young. I carried the tradition on every New Year.

Fresh out of the pan, the nian gao is gooey soft and stretches like mozarella cheese. It is always best eaten warm. Since I had some breadcrumbs left over, I thought I'd make my nian gao a little interesting this year. The result is a delicious sticky snack which is easier to handle.

Pan-Fried Breaded Nian Gao

Pan-Fried Breaded Nian Gao
Ingredients:
- 2 x 220g nian gao (sliced)
- ½ cup fine breadcrumbs
- 1 large egg (lightly beaten with a pinch of salt)
- Cooking oil

Method:
1) Dip nian gao slices in beaten egg. Then, coat well with breadcrumbs. Set aside.
2) Heat cooking oil in pan - just enough for a pan-fry.
3) Pan-fry the breaded nian gao in low-medium heat, turning once, until nicely browned. Remove gently as it is soft.

Best enjoyed warm with tea.

1) Three Ingredients - Egg, BreadCrumbs, Nian Gao
2) Dip Nian Gao In Egg
3) Coat Nian Gao With BreadCrumbs
4) Fresh Out Of The Pan Breaded Nian Gao

Pan-Fried Breaded Nian Gao

A Facebook friend suggested that I try it wrapped with popiah skin. I'm game for anything nian gao related! That will be my cooking project this week.

Nom nom nom Pan-Fried Breaded Nian Gao

How do you prefer your nian gao?

Read more...

Thursday, January 26, 2017

Foil Baked Prosperity Prawns

14 comments
For many Chinese, the Lunar New Year is celebrated with food that carries an auspicious meaning. For instance, uncut noodles represents 'longevity'. Hence the tradition of eating Mee Sua, in my family at least, on the first day of the New Year. It is to wish all of us a long life.

Foil Baked Prosperity Prawns

You must be wondering why I call these Prosperity Prawns. It's because I'm serving 8 in a plate. Here, eight is pronounced 'fatt ' in Chinese which means prosperity. I believe one of the best things about Chinese New Year is the fanciful names you'll hear for the dishes which is always about wishing friends and family well.

Other than that, I also find prawns to be a great dish to have for reunion dinners because it is red, a mark of happiness and good fortune. In Chinese, prawns are called ' Ha ' . Double it - haha is laughter. Hence, joy.

This is one of the many dishes I love preparing because it is easy to do and doesn't take up wok space. I need to use the stove for many other dishes so it is good to utilise all the available cooking appliances for better time management and to ensure food is served hot.

I don't believe we should tire ourselves out or stress over important occasions. Therefore, my menu often revolves around simple delicious dishes, with most recipes passed down by friends and family or having run through Mom's old recipes books.

Here's what I did but really, there is no need to follow the recipe to the dot. We have always gone the 'agak-agak' (more or less, a rough calculation) way, with several variations from garnishing with spring onions to using Bornean rice wine and more.

Foil Baked Prosperity Prawns

Ingredients:
- 300g prawns or 8 large pieces (deveined, leave whole)
- 6 cloves garlic (chopped)
- 1 thumb ginger (grated, about 1 ½ tbsp)
- 1 tbsp Shaoxing wine mixed with 1 tbsp water
- Pinch of salt
- Fresh coriander and slices of red chilli for garnishing

Method:

1) Pre-heat oven to 180C.
2) Line baking tray with foil. Place prawns on top. Spoon ginger and garlic over.
Drizzle with Shaoxing wine and sprinkle some salt over.
3) Cover with foil and bake until just done - about 12minutes for me.
4) Plate. Garnish with fresh coriander and slices of red chilli.

Top, left to right : The Ingredients, Place Ingredients Onto Foil Lined Baking Tray
Bottom : Prawns Fresh Out Of The Oven

There you go, short work.

With that, the team at Sweet Home-Chefs wishes you Gong Xi Fa Cai for the Year of the Rooster!

Read more...

Friday, January 6, 2017

Calamansi Lime Juice With Asam Boi

8 comments

A toast to 2017! Wishing all of us a fabulous year blessed with magical moments that will stay as fond memories for us to reminisce about in time to come.

Seeing that it's the season for clinking glasses, I thought it would be appropriate to share this delicious drink that we regularly make to enjoy on special occasions and humid days. It's easy to whip up and requires only two ingredients, not counting the water. Some people add sugar syrup for a bit of sweetness. For me, I think it all comes down to the variety of asam boi (dried/preserved plums) that we use. Some are more strongly flavoured than others.

Asam boi is an acquired taste of sweet, salty and tangy. Also known as Li Hing Mui , this is the stuff that jolts you awake with one small bite. Hence, I always bring a packet along for road trips. It keeps the person on the wheel awake for the long drive and gives everyone else in the car a burst of energy.

Calamansi Lime Juice With Asam Boi

I often choose the white variety for my asam boi lime drink. It is sweet enough for me not to add any sugar and tastes wonderful.

Calamansi Lime Juice With Asam Boi

Makes two glasses
Ingredients:
- 2 cups cold drinking water
- ½ cup hot water
- 3 white asam boi
- 4 calamansi limes (slice into half)
- Some ice cubes

Method:

1) Add asam boi into hot water. Steep for five minutes. This brings the flavour out.
2) Squeeze calamansi lime juice in, over a small strainer to catch the seeds. Add cold water. Give it a good stir and add ice.

Serve immediately.

Note: The amount of lime juice and quantity of asam boi you wish to add is really up to you - a personal preference thing.

All The Ingredients You Need - Asam Boi (From Tesco Malaysia) and Calamansi Limes

Calamansi Lime Juice With Asam Boi

That done, I'm off to the balcony - nothing like sitting outside with a delicious chilled drink in hand, the plants for company and the sky as my TV to make my day.

Calamansi Lime Juice With Asam Boi
Cheers!
Read more...

Thursday, November 10, 2016

The 2-Ingredient 'Lap Cheong' Salad

8 comments

Have you ever googled for a 2-Ingredient salad? I did. The results were not quite what I had in mind. Tomatoes and onions? Several other recipes included dressing that required a further 3 ingredients at least!

Well, that's not happening here. This really is a 2-ingredient salad. I'm going with lap cheong, a dried Chinese Sausage that is sweet, savoury and packs a punch in any meal.

Wikipedia describes it as:
"Lap cheong is a dried, hard sausage usually made from pork and a high content of fat. It is normally smoked, sweetened, and seasoned with rose water, rice wine and soy sauce."


Lap Cheong Salad

The 2-Ingredient 'Lap Cheong' Salad
For this recipe, you'll need:
- Lap cheong / Chinese Sausage (sliced)
- Chilled fresh flat-leaf parsley (roughly chopped)

Method:

1) Heat a non-stick pan up without oil. Dry pan-fry the lap cheong pieces. Do this on medium-low heat as it gets burnt easily. Remove the lap cheong from the pan the moment it's slightly charred. 

Note: You can use the oil that has oozed out from the lap cheong during pan-frying to do a quick vegetable stir-fry. I do this immediately after removing the lap cheong.


2) Mix and toss with flat-leaf parsley.

Enjoy as a side dish with rice or congee.

Alternatively, you could use fresh coriander but I find this parsley to be a better contrast of flavour and it stays crunchy for a longer period.
Read more...

Wednesday, October 5, 2016

Sauteed Shrimps With Golden Kiwifruit

10 comments
The red, gold, and green sauteed shrimps. Am I too early for Christmas? I know I am but the thing is I love festive colours, regularly including green and red into many of the dishes I cook at home - chilli and fresh coriander topping the list of most used ingredients!

Hubs popped a packet of golden kiwifruit into our shopping basket one Sunday. I was excited by the yellow colour of the flesh of the kiwifruit, and it wasn't long before I started thinking how nice it would be in some sort of salad.

Sauteed Shrimps With Golden Kiwifruit

Quick and easy, this is what I came up with!

Sauteed Shrimps With Golden Kiwifruit

Ingredients:
- 200g shrimps (sliced in half)
- 1 large kiwifruit (cubed)
- 4 cloves garlic (pounded or chopped)
- ¼ chilli flakes
- ¼ black pepper
- Some fresh coriander (chopped)
- Salt to taste
- Cooking oil

Method:

1) Heat 1 to 2 tbsp cooking oil in pan. Saute garlic until fragrant.
2) Add the shrimps and season with salt, black pepper and chilli flakes. Pan-fry the shrimps until cooked. Then, remove from pan and let it cool for a bit before adding the kiwifruit and coriander. Eat!

1) Shrimps, Golden Kiwifruit, Garlic, Coriander.
2) Pan-fry the shrimps.
3) Toss to mix. 4) Eat!

Red, gold and green - the three colours that make this a visual treat, for me at least.

Sauteed Shrimps With Golden Kiwifruit

Mangoes make a great alternative. Dragonfruit would be nice too but the flavour would then be subdued. The more intense sweet and sour from the kiwifruit give this dish a kick on the taste buds. I like it!

Read more...

Sunday, September 18, 2016

Daun Pegaga Masak Lemak (Centella In Turmeric Coconut Gravy)

9 comments

Daun Pegaga
aka Centella, Gotu Kola or the Asiatic Pennywort is mostly eaten raw in Ulam, a Malaysian rice salad or cooked 'masak lemak' style, that is, in coconut milk gravy.

Centella In Turmeric Coconut Gravy

It's also delicious in Urap, an Indonesian salad consisting of steamed vegetables mixed with seasoned grated coconut. I will try it this way one day. For now, I'm having my Daun Pegaga in a yummy coconut gravy with pounded fresh turmeric, strips of dried squid and anchovies. The aroma was tantalising and I felt an urge to eat it fresh out of the pan even before it touched the dinner table. Tsk, tsk!

Below is a picture of Daun Pegaga. It is a little tougher than most greens I know and is mildly bitter-tasting but not unpleasant. I munched away quite happy with the flavour.

Daun Pegaga / Centella Asiatica / Gotu Kola

Daun Pegaga Masak Lemak (Centella In Turmeric Coconut Gravy)
Ingredients:
- 40g daun pegaga (snip roots away, cut in half)
- 1 lemongrass (smashed)
- 1 red chilli (pounded)
- ½ thumb fresh turmeric (pounded)
- 15 dried anchovies (rinsed)
- 1 tbsp dried squid strips (optional) (soaked for 10 mins and rinsed)
- ½ cup coconut milk
- 1 cup water
- ⅛ tsp salt (to taste)
- Half ⅛ tsp sugar (to taste)

Method:
1) Heat milk and water in pan. Bring to a simmer, just below boiling point.
2) Then, add lemongrass, turmeric, chilli, dried anchovies and dried squid strips. Cook for a couple of minutes for the flavour to come together. Stir constantly and keep it from boiling.
3) Season with salt and sugar.
4) Finally, add in daun pegaga. Cook until done like you would any green leafy vegetable.

From top-left : Ingredients, Simmer All The Ingredients, Serve!

Best eaten with rice.

Read more...

Saturday, September 3, 2016

Prawns With Creamy Salted Egg Yolks Sauce

24 comments

I'm late! I'm late! I'm late to the salted egg yolks party, but it's a trend that I believe will never go out of style because it is numero uno on the yumness scale! Therefore, any time is a good time to jump on the bandwagon.

'Sap Ham Dan Har' (Wet Salted Egg Prawns) is a dish hubs and I regularly order at a Chinese restaurant nearby for visiting friends and relatives to try because it puts the oohs and aahs around the dinner table.  It has always been on my mind to cook this. However, nothing materialised until I decided to make my own salted duck eggs a month back. When the eggs were ready, I started searching for recipes to use it up.

Prawns With Creamy Salted Egg Yolks Sauce

A little googling brought me to Lia's Food Journey blog. It looked closest to the dish I wanted to recreate. I made a couple of changes to suit my palate, of course.

The result is this dreamy salty-sweetish prawn dish that had us licking the plate clean!

Prawns With Creamy Salted Egg Yolks Sauce

Ingredients:
- 330g prawns (deveined)
- 5 salted duck egg yolks (steamed and mashed with a fork)
- 4 cloves garlic (pounded)
- 1 red chilli (sliced)
- 6 dried or fresh kaffir lime leaves (optional)
- 45g butter
- ½ cup evaporated milk
- 2½ tsp sugar (to taste)

For frying:
- 4 tbsp corn flour
- 1 beaten egg
- 4 tbsp cooking oil

Method:

1) Dip prawns in beaten egg, then coat with corn flour. Pan-fry in cooking oil until just done. Remove prawns from pan.
2) Leave about 1 tbsp of the cooking oil in the same pan (spoon out excess). Add butter and garlic. Saute until the butter is melted.
3) Add kaffir lime leaves and the mashed egg yolks. Stir to combine.
4) Then, add evaporated milk and sugar (to taste). Stir until creamy. The sauce is done. Lower the heat or switch it off.
5) Add the prawns back into the pan along with slices of red chilli. Stir until the prawns are all coated with the sauce.


1) The ingredients. 2) Dip prawns in egg and coat with corn flour.
3) Pan-fry the prawns. 4) Heat butter, saute garlic in pan for the sauce.
5) Add mashed salted eggs and kaffir lime leaves. 6) Stir quickly.
7) Add evaporated milk. 8) Finally, mix the prawns together.

There you go. Best eaten with rice!

Prawns With Creamy Salted Egg Yolks Sauce


Read more...

Thursday, August 18, 2016

Garlic Chives Mee Hoon Kueh

12 comments

The Hokkiens call it Mee Hoon Kueh, the Hakkas know it as Pan Mee. These are easy handmade noodles that can be prepared anytime using basic ingredients that are found in most Malaysian households.

Garlic Chives Mee Hoon Kueh

Generally, the Hakkas' method of making this is to cut the noodles into straight flat strands using a wooden block. Hence, the name Pan Mee (Board Noodles). This was how it was done in the old days. Fast forward now, the term is used less strictly with Pan Mee sellers offering a choice of hand-torn noodles too.

Wikipedia provided an excellent answer to my curiosity :
"The current style is a mix between the traditional methods of Hakka and Hokkien. The Hakka initially made the noodle by shaving off a dough, whilst the Hokkien would roll the dough into a flat piece then hand-tear into bite-size."

I learnt to make these hand-torn noodles through an old home cooking magazine I was subscribing to in the 1990s, adding my own twist with chopped garlic chives. Lack of a perfectionist state of mind leaves my mee hoon kueh less prettily shaped. However, there was no compromise on the texture and the taste. I conclude - don't worry about how it looks!

Garlic Chives Mee Hoon Kueh

2-Person Portion

For the noodles
Ingredients:
- 165g Tesco enriched wheat flour
- 1½ tbsp chopped garlic chives / kucai
- 1 egg (lightly beaten)
- ½ tbsp corn flour
- ½ tsp salt
- 1 tbsp cooking oil
- 60ml water

How-to:

1) In a bowl, mix flour, corn flour and salt together.
2) Add the wet ingredients, that is, the egg and oil.
3) Knead into a dough, adding just enough water for all the ingredients to come together.
(I added about 60ml water).

4) Rest the dough for ½ an hour.

Optional: Immerse the dough in water for about 4-5 hours to remove some of the gluten in the flour.
Pour the water away and rinse the excess flour out by kneading the dough under light running water (no need to be thorough). The dough will be wet and springy.


5) Knead the chopped garlic chives in. The mee hoon kueh is now ready for use.
6) Blanch the mee hoon kueh in hot water before adding it into soups.

Boil a pot of water. Oil or wet your fingers. Pinch a small portion of the dough into the pot of hot water. Cook for a couple of minutes or more until done. Strain the water away and add the noodles into soup of choice. Alternatively, just cook the noodles together with the soup.


1) Flour, corn flour, salt, egg and oil. 2) Mix dry ingredients with wet ingredients.
3) Use your hand to bring the dough together. 4) Knead.
5) Immerse in water. 6) Add in garlic chives.
7) Springy dough. 8) A cooked mee hoon kueh.

Tip: Soup isn't the only way to enjoy mee hoon kueh. It can be 'dry' (as we call it), flavoured with a mixture of soy sauces and chilli..


I had my mee hoon kueh the typical way, that is, with anchovies soup. For the greens - since I was growing some Pak Choi in my little garden, I plucked a few leaves to go with it.

For the soup
Ingredients:

- ¼ cup dried anchovies (Bilis Jepun/Japanese Anchovy. Rinsed.)
- 2 dried black fungus (Soak in water until rehydrated - about 30 mins. Slice thinly.)
- 3 dried mushrooms (Soak in water until rehydrated - about ½ day. Slice thinly.)
- 6 Pak Choi/Bok Choy leaves or more
- A pinch of Knorr Ikan Bilis stock cube
- Salt and white pepper to taste
- Water

Garnish:
- A handful of crisp fried onions
- A handful of crisp fried anchovies
- 1 red chilli (sliced thinly)

How-to:
1) In a deep pot, bring 1.5L water to a boil.
2) Add mushrooms, black fungus and dried anchovies along with a pinch of anchovies seasoning cube. Cook on medium heat for at least 5 minutes. Taste and season accordingly with salt and white pepper. Cook for a further couple of minutes or so to allow the flavours to come together.
3) Finally, stir the pak choi greens in.
4) Place the cooked mee hoon kueh into serving bowls. Pour the anchovies soup in along with mushrooms, the greens and black fungus. Garnish with fried anchovies, slices of red chilli and fried onions.

Note: The soup was done in about 10 minutes.

1) The ingredients for the soup. 2) Boil it all. Easy-peasy!
3) Serve garnished with fried onions, chilli and ..

Garlic Chives Mee Hoon Kueh topped with Crisp Fried Anchovies!

There are several mee hoon kueh recipes on the net with small variations in the method and ingredients, mostly made through a perspective of personal preference. This is a recipe I tried and tweaked out of a magazine and am pleased to report that it rocks!

Garlic Chives Mee Hoon Kueh. Eat!

Read more...

Saturday, July 23, 2016

Baked Eggs With Sardines And Cabbage

22 comments

It was supposed to be a tart.  A dreamy Diana Henry creation of pastry topped with sardines, except that I had planned on adding vegetables and a slice of lemon on the side. As it happened, nothing turned out the way it was visualised in my mind - I didn't have the necessary ingredients on hand.

My plans to go grocery-shopping and to meet a friend to drop off the BBQ set I had given away was thwarted by car trouble. The old sweetheart wouldn't crank up.  There you go, a kink in my otherwise perfect morning.

Baked Eggs With Sardines And Cabbage

So, eggs were used instead and a sunshiny dish was born to bring cheer to an otherwise gloomy-weather day. Someone said it looked like pizza. Surely a good looking one?

Baked Eggs With Sardines And Cabbage

Ingredients:
- 6 small fresh sardines
- 6 eggs
- 1 red chilli (sliced)
- 2 cups sliced cabbage
- ⅛ tsp salt
- Black pepper (several dashes)
- 1 tbsp cooking oil
- An 11" round baking dish

Method:

1) Brush cooking oil around the baking dish.
2) Lay the cabbage inside.
3) Beat egg with salt. Pour it around the cabbage.
4) Rub sardines with a bit of salt and place on top of egg/cabbage mixture.
5) Sprinkle chilli slices on top and finish with several dashes of black pepper.
6) Bake at 175C for about 25 minutes.
(Note: Baking time will vary depending on your oven and type of pan.)


1) Lay the cabbage into the dish. 2) Pour beaten egg over.
3) Place sardines on top, decorate with slices of chilli and dashes of black pepper.
4) Bake until the fish is cooked. 5) It's done!

Baked Eggs With Sardines And Cabbage

Best eaten on its own paired with ketchup or sauce of preference.

Read more...

Monday, July 18, 2016

Braised Chicken With Olive Vegetable

17 comments

A dash of salt, white pepper and some chopped garlic is how I regularly stir-fry vegetables. Things became a little more interesting when I started exploring beyond the norm, trying out various condiments available in our supermarket.

One of it was a jar of Olive Vegetable. This, I discovered, is really chopped mustard greens with olives and not leaves from olive trees per se as I had initially thought from the name on the jar label. Anyway, it is from then on that I have begun flavouring my french bean stir-fries this way - a teaspoonful of olive vegetable for a plate. A brilliant way to add taste to a dish without the usual seasoning.

I discovered from the world wide web that it's delicious in fried rice too, but I have yet to try this. Instead, I went further with a braised chicken dish. It turned out to be a finger-licking experiment and I am glad that I made extra!

Does this not look yummy?

Braised Chicken With Olive Vegetable

Braised Chicken With Olive Vegetable

Ingredients:
- 8 chicken wings (slice into two, that is, separate drumettes from wingettes/tips)
- 8 cloves garlic (pounded with pestle in a mortar)
- 1 red chilli (sliced)
- 3 tbsp Singlong Olive Vegetable (using a strainer, drain oil from vegetables, keep oil aside)
- ½ tbsp corn flour (with 1 tbsp water stirred in)
- 2 cups water
- Pinch of salt (optional)

Method:

1) Heat olive vegetables oil (just the oil!) in pan.
2) Pan-fry the chicken pieces in medium heat until lightly browned.
3) Push the chicken aside. Add garlic and saute for a bit before stirring it together with the chicken.
4) Then add olive vegetables. Stir- fry.
5) Add water, turn the heat up and bring to a simmer. Cook on low heat with the lid on but slightly uncovered.
6) Once the chicken is done (about 15minutes), remove the lid and cook uncovered on high heat until the liquid is reduced by half. Taste and if necessary, season with salt.
7) Switch the heat off. Add the slices of chilli and thicken the sauce with the corn flour mixture. Stir to combine. Done!

Best eaten with fluffy white rice.

1) Chicken, Garlic, Chilli, Olive Vegetables + Oil.
2) Pan-fry the chicken, then saute the garlic.
3) Add olive vegetables. 4) Add water and simmer.
5) Lastly, add slices of chilli and thicken with corn flour.
6) Braised Chicken With Olive Vegetable .. Done!

Braised Chicken With Olive Vegetable. Yum with rice!

There you go, an easy recipe!

Read more...

Saturday, July 9, 2016

Pan-Fried Lamb Shoulder Chops With Strawberries

18 comments

Selamat Hari Raya to our Muslim blog readers!

6 July marks the end of the fasting month for 2016. I will miss the vibrant Ramadhan Bazaars that were aplenty in my neighbourhood. However, the food scene is no less quieter with makeshift lemang stalls popping up along the roadside, Raya cookies and dodol which we received from friends. Lemang is coconut milk glutinous rice cooked in a bamboo stick over an open fire. I'm aiming to get some this weekend.

This blog post is nothing to do with local food, however. I thought it'd be a nice change to have lamb for dinner after a month of feasting on traditional eats. It was paired with small strawberries which I bought for a bargain at a supermarket. 'Tis the belt-tightening season. Funnily, it's not just about the finances. My waistline is waging a war with burgeoning love handles. That said, I wish I'd gotten more of the strawberries; it would have been beautiful in a fruit tart too.

Pan-Fried Lamb Shoulder Chops With Strawberries

Pan-Fried Lamb Shoulder Chops With Strawberries
Ingredients:
- 340g Lamb Shoulder Chops (or 3 pcs)
- 150g small fresh strawberries (leaves removed)
- 2 kiwi fruits (cubed)
- 2 shallots (sliced)
- 3 stalks lemongrass (smashed)
- ½ tbsp cumin seeds
- 2 tbsp coarse salt
- 1 tsp ground nutmeg
- 2 tsp sugar or to taste
- A dash of black pepper
- 1 tsp corn flour (mix in 1 tbsp water)
- 1 tbsp cooking oil
- About ¼ cup water

- Some boiled broccoli or vegetable of choice, butter and salt (toss together) .

How-to:
1) Rub the lamb with coarse salt. Leave aside for about 15 minutes.
2) Boil some broccoli florets in a pot of water. Dunk the boiled broccoli into cool water to stop the cooking process. Immediately toss in butter and a sprinkle of salt. Keep aside.
3) Rinse the salt away from the lamb cuts. Rub on ground nutmeg and cumin seeds.
4) Heat cooking oil in pan. Place the smashed lemongrass into the pan and the lamb cuts on top of it. Pan-fry the meat for a couple of minutes on each side or to a level of doneness of preference. Then, remove the cooked lamb cuts from the pan and leave aside to prepare the sauce.
5) Using the same pan, splash in a tbsp or two of water. Add the onions. Stir-fry it for a bit before adding the kiwi fruit.
6) Cook the kiwi fruit until it looks a little smashed. Add sugar, a little water and a dash of black pepper. Stir to combine.
7) Add the strawberries. Cook until slightly tender.
8) Finally, switch the heat off and stir the corn flour in to thicken the sauce. Add more water if you find the sauce too gooey.
9) Plate the lamb and pour the strawberry-kiwi sauce over. Serve immediately with vegetable of choice.

1) The Ingredients. 2) Pan-fry the spiced lamb pieces.
3) Cook to a level of doneness that is to your liking. 4) Prepare the strawberry sauce.

Taste-wise, the tangy sweet-savoury strawberry-kiwi fruit sauce went very well with the salted spiced lamb.

Pan-Fried Lamb Shoulder Chops With Strawberries

I've never been one to shy away from experimenting with new flavours. This one worked out wonderful for me.

Read more...

Wednesday, June 8, 2016

Oven-Roasted Baby Potatoes With Curried Pumpkin

17 comments

I've probably mentioned several times on this blog that we're rice-eating people. Occasionally, I break out of the norm with just potatoes and meat. This is more of a side dish. I needed something to pair with plain roasted chicken.

Oven-Roasted Baby Potatoes With Curried Pumpkin

The dish is simply flavoured but no less delicious with pork lard and dried spices to amp things up just a bit.

Oven-Roasted Baby Potatoes With Curried Pumpkin
For the potatoes -
Ingredients:
- 350g baby/cocktail potatoes
- 1/8 tsp chilli flakes
- 1/8 tsp salt or to taste
- 1 tbsp melted pork lard
- Some fresh coriander (chopped)
How-to:
1) Mix all the above together (except the coriander). Bake until done. It took about 40minutes at 180C for me. Use a skewer to check.
2) Serve garnished with fresh coriander.

For the pumpkin -
Ingredients:
- 360g pumpkin (remove seeds, wash but leave the skin on)
- 1 yellow onion
- 6 cloves garlic
- 2 tbsp Alagappa's meat curry powder (mix with a bit of water into a thick paste)
- 2 dried cloves
- 1 cinnamon stick
- 4 tbsp cooking oil
- ¼ cup coconut milk
- Some water
- Pinch of Knorr chicken stock cube
- Salt to taste

How-to:
1) Steam the pumpkin until cooked. Spoon the flesh away from the skin and leave aside.
2) Blend the onion and garlic. Use a bit of water to get it going, if necessary.
3) Heat cooking oil in pan. Add the blended onion/garlic. Saute until just fragrant.
4) Add the spices and curry powder. Stir for a minute before adding the pumpkin in.
5) Then add ¼ cup water, pinch of chicken cube and salt to taste. Cook into a thick paste.
6) Switch the heat off, stir the coconut milk in. Let it cook for a bit before dishing out.


1) Potatoes, Chilli Flakes, Pork Lard.
2) Mix all the ingredients in 1) and bake!
3) Steamed Pumpkin, Curry Paste and Blended Onion/Garlic.
4) Saute the onion/garlic, add the curry paste and spices.
5) Add the pumpkin.
6) Stir the coconut milk in last. Cook into a thick paste.

Oven-Roasted Baby Potatoes With Curried Pumpkin

Serve as a side dish with chicken, topped with roasted potatoes.

Oven-Roasted Baby Potatoes With Curried Pumpkin and Chicken

There was way too much pumpkin for two people, so I had whatever was left over for breakfast the next morning. The basics -- spread the curried pumpkin onto an oven-proof plate, make a hole in the center and break an egg in. Then, bake until the egg is done.

Curried Pumpkin With Egg

Read more...

Wednesday, May 25, 2016

Chrysanthemum Greens With Shrimp Paste (Stir-Fry)

21 comments

I make it a point to include vegetables into every meal, breakfast being the exception. It's always a hot chocolate malt drink in the morning, occasionally a pastry and then off we go to work or start on our chores. Guilty as charged for rushing through the most important meal of the day!

Tong Ho or Chrysanthemum Greens as I know it, is one of the many leafy vegetables that receives a lot of love in this household, in the nom nom sense, that is! I would describe the taste as tangy, with a faint peppery flavour plus just a tinge of bitterness coming across.

Chrysanthemum Greens With Dried Shrimps and Shrimp Paste

This vegetable wilts quickly during cooking. It's best to have everything prepared and close at hand.

Chrysanthemum Greens With Shrimp Paste (Stir-Fry)

Ingredients
- 200g Chrysanthemum Greens
- 4 cloves garlic (pounded)
- 1 red chilli (sliced)
- 1 tbsp dried shrimps (rinsed and pounded)
- 1 tsp shrimp paste
- 4 tbsp water
- 2 tbsp cooking oil

How-to

1) Heat oil in pan.
2) Saute garlic and shrimp paste for a bit.
3) Add dried shrimps and chilli. Stir-fry.
4) Add water and then the greens. Stir-fry.
5) Once the greens wilt, it's done!

Note: I didn't have to season this with salt. The dried shrimps provided enough saltiness.

1) Chrysanthemum Greens. 2) Pounded Garlic and Dried Shrimps.
3) Saute garlic and shrimp paste. 4) Add chilli and dried shrimps.
5) Add the greens and some water.

Best eaten with plain rice.

Chrysanthemum Greens With Shrimp Paste

Read more...

Wednesday, May 18, 2016

Chicken Satay Pizza - The Shortcut!

14 comments

This is easy to make and especially so if you're living in Malaysia where good chicken satay is sold everywhere. Oh, the convenience!

Lightly charred skewered chicken pieces, grilled over hot charcoal, is the stuff of heaven for locals. The meat is marinated in a blend of herbs and spices usually consisting of lemongrass, ginger, galangal, cumin seeds, fennel and turmeric making it delightfully flavourful.

If you're looking for a shortcut to a delicious meal, then this recipe is for you. It's something you make when you're not up to doing a whole lot of work for good-tasting pizza. 

My husband enthused after trying this once, "We should think about stocking up on pizza dough ...just in case." I don't think I need to elaborate on what he means by 'just in case'. It looks like pizza dough is going to be a regular grocery purchase, and we'll be ordering satay takeaways more often!

Chicken Satay Pizza

Chicken satay is typically sold (in Malaysia at least) with spicy peanut gravy, fresh cucumber and onions included. This is all you need to make the pizza topping. For best results, use thick peanut sauce.

Chicken Satay Pizza

Ingredients:
- 1pc 9" ready-made pizza dough/base (I went with Tricious)
- 8 sticks grilled chicken satay (remove meat from skewers) + thick spicy peanut sauce, fresh onions and cucumber
- ½ packet Family Favourites 150g pizza topping with mozzarella
Optional
- 1 red chilli (sliced)
- 1 green chilli (sliced)

How-to:
1) Place pizza dough onto a piece of baking paper. Spread the spicy peanut sauce on top (scoop on more peanut than the liquid.).
2) Top with with chicken satay pieces, the onions, red chilli and green chilli.
3) Finally, sprinkle grated mozzarella pizza topping around.
4) Bake in a pre-heated oven according to instructions on the pizza base box. 
5) Eat with chilled cucumbers on the side!

Don't thank me for being a genius. The credit goes to my close friend Sharmini Segari, who shared the idea with members in our cooking group some three years ago.

1) The Ingredients 2) Spread satay sauce on
3) Top with chicken, onion, chilli 4) Sprinkle grated mozzarella around
5) Bake in the oven!

Best enjoyed with friends and family!

Chicken Satay Pizza


Read more...
 

Sweet Home-Chefs Copyright © 2013-2017 Template Designed by BTDesigner · Powered by Blogger