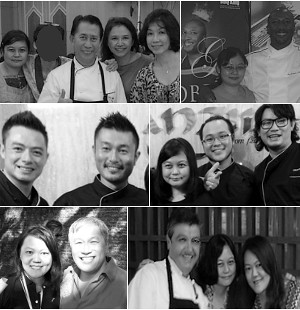
AFC GRILLED : Chef Sean Connolly

An evening of good food.

Lap Cheong Watermelon Bites

An asian take on watermelon bites!

Baked Fish with Kiwi in Sweet and Sour Sauce

Add a twist to sweet and sour fish!

Semperit Pandan Cookies

Cute cookies for the festive season!

Showing posts with label Cake. Show all posts

Monday, September 14, 2015

Steamed Lap Cheong Cakes

14 comments

Have you ever had a craving for something so strong that it creeps into your mind at every 'hungry' opportunity? I've been walking around with visions of me tucking into scrumptious steamed cakes laden with bits of Lap Cheong (Chinese Sausage). After weeks of torment, I finally decided to put the matter to rest!

I took to the kitchen, slamming cabinet doors along the way as I gathered the necessary ingredients. Soon, Steamed Lap Cheong Cakes were born. I held one warm luscious cake in hand. The first bite I took was so satisfying that I felt an overwhelming desire to give myself a big hug!

This is what it looks like fresh out of the steamer.

Steamed Lap Cheong Cakes

For the cake recipe, head on to Piggy's Cooking Journal at http://www.piggyscookingjournal.com/2007/09/steamed-cake.html .

These are the changes I made. I replaced olive oil with corn oil. Instead of sesame seeds or pine nuts, I added lap cheong that I had sliced into small bits. Quantity used: 1 regular tube of lap cheong (about 6in long) was sufficient. An inch out of it was kept aside and used as topping.

This recipe produces 6 regular cupcake-sized cakes, which is great because these are best eaten when it's fresh and warm. Although taste-wise it remains great the next day, the texture of the cake is less than satisfying even after re-heating.

Below is a photo of the batter, already mixed with lap cheong bits and spooned into the cake mould.

Filling The Cake Mould With Batter

I used a toothpick to test if the cakes were done. It was and took only 15 minutes in a pre-heated steamer.

After 15 Minutes Of Steaming

The cakes were soft, yet bouncy to the touch, much like babies' cheeks.

Allowing The Hot Cakes To Rest

A close-up shot I took whilst waiting for the cakes to cool a little.

A Close-Up Of A Rogue Lap Cheong Bit

As soon as I could, I eased one cake out and started eating. Before I knew it, I had finished two.

My thoughts ran along, "Gosh, this is yummy..."

T
Munching On A Warm Lap Cheong Cake

The verdict: Lap Cheong (Chinese Sausage) is one of the best ingredients I've ever added to a cake!

Read more...

Monday, December 8, 2014

Eggless Honey Walnut Cake

12 comments

'Tis the season to be jolly. That's how it feels to be in the kitchen these days, brimming with life and hums of holiday tunes. No sooner had I finished baking Christmas Tree cookies, I was already scouring my books and the web for another recipe to try.

But boohoo, I ran out of eggs! Hence, my first attempt at an eggless cake recipe. What do you think? 

Eggless Honey Walnut Cake

It turned out great. Taste-wise, no less delicious and it was very moist. It's day two and the cakes are still good, left outside at room temperature in a container.

A Slice Of Eggless Honey Walnut Cake

This is a recipe I adapted from Taste Goblet - Eggless  Maple Pecan Cake. I changed some of the ingredients and, always wanting a shortcut, the steps differ too.

Eggless Honey Walnut Cake
Ingredients:
- 1½ cups cake flour
- ¾ tsp baking soda
- 1 tsp baking powder
- ½ tsp salt
- 6 tbsp caster sugar
- ½ cup roughly crushed walnuts
- ½ cup vegetable oil
- 3 tbsp Tasmanian pure leatherwood honey
- ½ cup milk + juice of 2 calamansi lime (mix together)
- A little butter for greasing the baking tin

How-to:
1) Sift cake flour, baking soda, baking powder and salt together into a bowl.

2) Add walnuts and caster sugar. Stir to combine.

3) Push the mixed flour aside to make a hole in the center. Pour oil, milk-lime mixture and honey into the hole. Stir the wet and dry ingredients together until just combined.

4) I use a baking tin with 8-rectangular holes. Grease six of the moulds with butter. Then, fill with batter until ¾ full.

5) Bake in a pre-heated oven at 170C for 15minutes. Reduce to 165C for a further 5 minutes. Total bake time : 20 minutes. Use a skewer to check - if the skewer comes out clean, the cake is done.

This baking time and temp works best for my oven. Do a bake test (of 1 piece) to find out what works best for you.

6) Allow the cakes to cool in tin for about ten minutes before turning out onto a wire rack. The cakes should slide out of the mould with a little tap. Let it cool completely before decorating.

7) For a Christmassy feel, I dusted the cakes with icing sugar and sprinkled some white and gold sugar pearls over.

The cake is sweet enough on its own. Frosting is not a must.

1) Pure leatherwood honey 2) Add sugar and nuts to the flour mix
3) Combine all the dry ingredients. 4) Add the wet ingredients and combine

1) Pour batter into baking tin 2) The cake rises
3) Bake until nicely browned 4) Test with skewer and remove from oven


Let The Mini Cakes Cool!

No Greaseproof Paper Required!
Individual cake mould size : About 2x3 inches each

Well, that's that. I'm off to enjoy another slice! Happy Holidays, everyone ♥

Eggless Honey Walnut Cake

~~~~~~~~~~~~~~~~~~

This blog post is linked to Cook and Celebrate: Christmas 2014 organised by these wonderful people - Yen from Eat your heart out, Diana from Domestic Goddess Wannabe and Zoe from Bake for Happy Kids.


Read more...

Sunday, August 31, 2014

Basic Butter Cake

21 comments

It's been a rough year for Malaysia in general.

Today, we celebrate Merdeka Day (Independence Day) on a solemn note. For the first time in as long as I can remember, no celebratory fireworks were lit at the stroke of midnight. As I write this, it is all quiet in the night sky. The only noise is the sound of passing cars and the screechy vroom of small motorbikes - the Mat Rempits, we label them.

Basic Butter Cake

Since we had decided on loafing at home for the long weekend, I decided to bake a cake to keep us company ..and it does make good company. It's always comforting to know that there's something within reach to snack on.They say that a hungry man is an angry man. We don't want any of that happening here, now do we *wink*

I tried this recipe from food-4tots.com. For the how-to and tips, visit the page directly. This is my adventure in pictures and my personal experience baking this wonderful recipe.

1) Lightly grease baking tin. Line with baking paper.
2) Beat butter with sugar. Add the eggs one by one, beating as you go.
Then, add 1 tsp vanilla essence.
Slowly add sifted flour +  double action baking powder +  tsp salt.
Finally, mix in 4 tbsp of milk.
3) Pouring the batter into a 18cm square tin. Level the mixture out.
4) Bake at 175c for 40-45 minutes

1) Oo..it's rising. It's also browning a little too quick.
2) Ecstatic that it's evenly cooked and browned.
3) Lovely bottom too.
4) Letting it cool.

Perfectly Browned Butter Cake

Let's Eat!

Texture: It's moist enough and not as dense, as you can see. I admit rather embarrassingly that five slices have made their way into my stomach whilst composing this blog post. Uh-oh!

A great tip I learned from this baking experience: When I noticed that my cake was browning a little too quickly, I loosely placed a foil over the tin to prevent the cake from getting burnt on top (as suggested in the recipe) - but I waited for it to brown evenly to a nice shade before doing this. Yes, I was glued to the oven door.

I used an 18cm square baking tin instead of the suggested 22cm baking tin. This left me with a small portion of batter remaining. I baked what's left over in a medium-small round baking tin, lightly greased with butter. No baking paper was used to line the tin. This was the result:


Butter cake - no baking paper

It slid out of the baking tin effortlessly. This is one recipe that I'm noting down where baking paper is not a necessity.

You know what will go nicely with this cake? A good movie. I hope you enjoy your weekend as much as I am loving my day. You know the saying - eat, drink and be merry, for tomorrow we diet.

To fellow Malaysians, Selamat Hari Merdeka!

Read more...
 

Sweet Home-Chefs Copyright © 2013-2017 Template Designed by BTDesigner · Powered by Blogger